
1.Welcome to TouchIT Rapide Training
Hello,
Welcome to this training course for the TouchIT Rapide LED. In this course, we’ll cover all of the basics of the LED to have you up and running in no time.
In this first lesson, we are going to look at finding our way around the LED.
If you would like to do some additional reading, this blog post is a great intro First 5 Things you should do with your new TouchIT Interactive LED
Basic Operation of the TouchIT Rapide
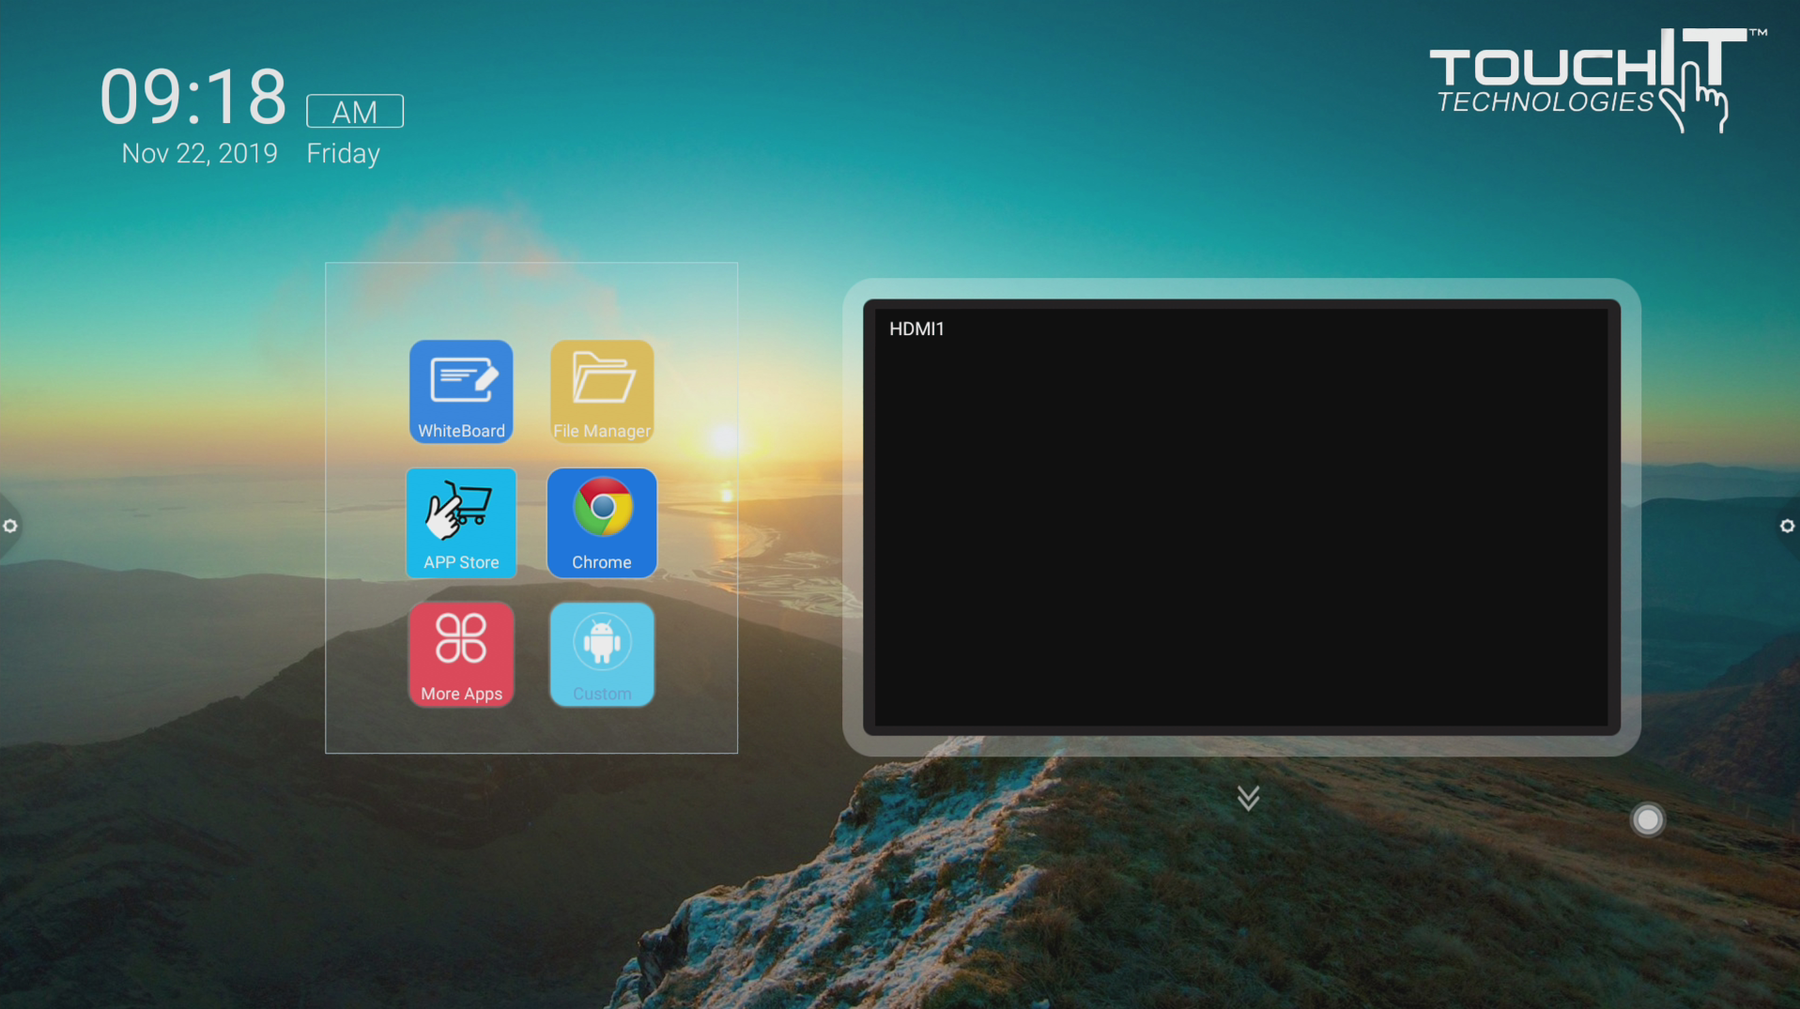
After you have connected your TouchIT Rapide to a Power Outlet, you are ready to turn it on. Once it is switched on and boots up (less than 30 seconds) you will be presented with the Home Screen.
On the left hand side is the links to the Apps under the clock, and the black square is your signal. preview. This is where you can view the screen of your connected computer if you are going to use one.
Connecting your computer – you need 2 cables. A USB Cord and a HDMI Cable – both came in the box with your LED.
USB Cable For Touch
Plug one end of the USB (B type) cable to the TouchIT Rapide LED and the other end USB (A type) connector to your computer.
We suggest using the front USB For Touch port as your main connection. Please note, you cannot mix and match Front and Rear ports. EG Both your HDMI and USB have to come from either the rear of the unit or the front of the unit.
If you can’t find the USB Touch input on the rear of the unit, it is on the underside of the input panel where you can see the HDMI inputs. There are more connections underneath the unit as indicated by the arrows on the image below.
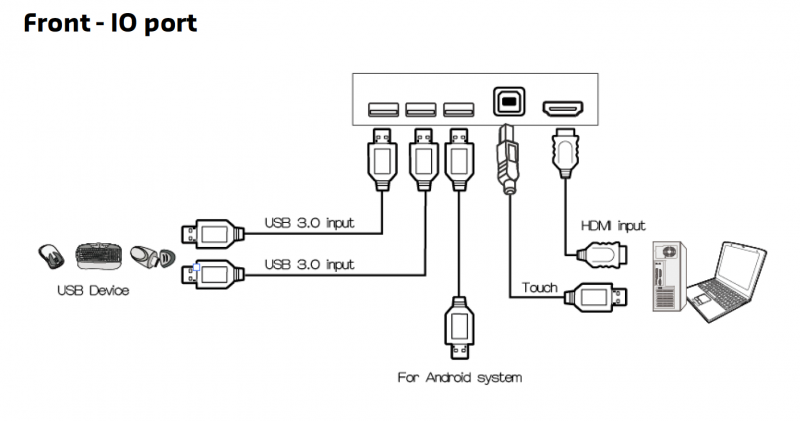
HDMI for Image and Sound
Plug one end of signal source connector of device ( PC, Laptop, IPC, or devices with HDMI), and the other end to signal source connector of the TouchIT Rapide LED. We suggest using one of the rear HDMI ports as your main connection leaving the front connection port for a secondary machine.
Signal Preview
The signal preview allows you to display the computer you are connecting to the LED and switch between it and the onboard android by just tapping the screen. First, you need to choose the input that you are using by clicking on the down arrow and selecting the input as below. You should now see the image in the signal preview.
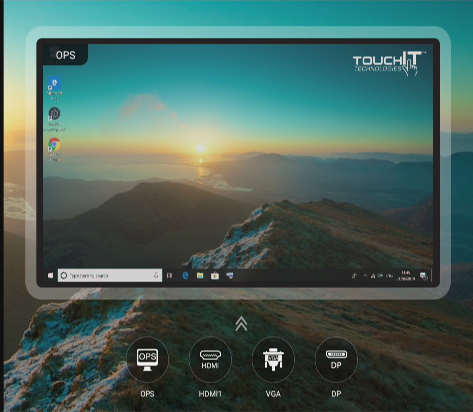
To switch to your computer, click the image. To switch back, swipe up and choose home from the Pop-up menu described below.
The Menus
There are a number of Menus available to you, so let’s take a look at each one.
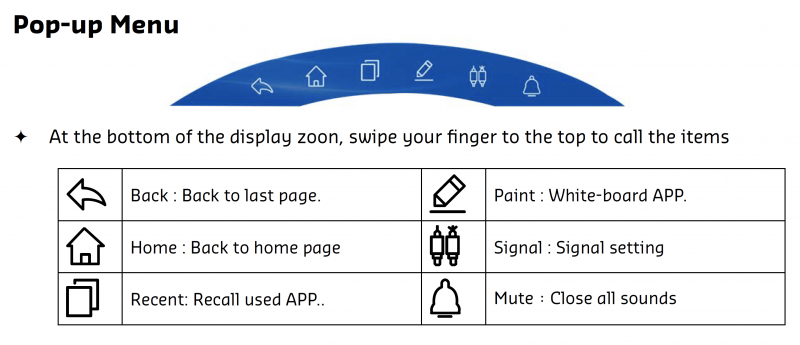
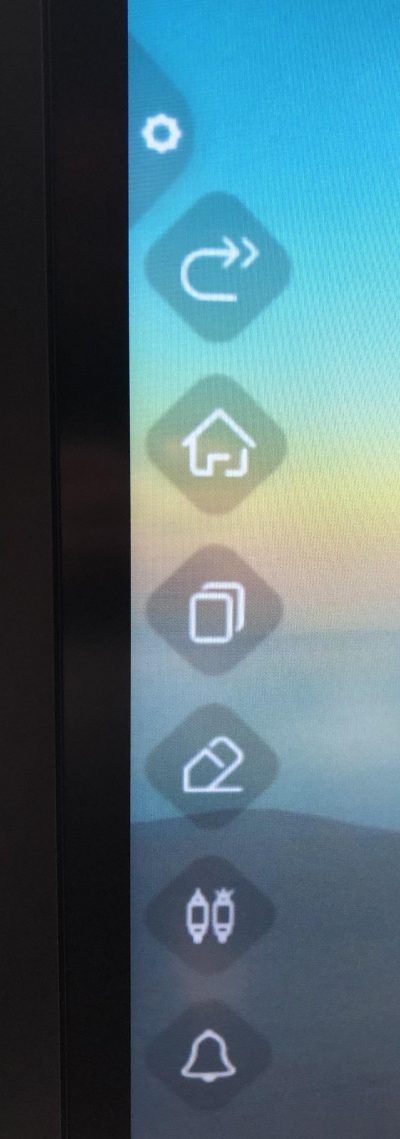
Side Menu
On each side of the LED, you will see a “gear” icon which is a short cut menu. This gives you access to the following options.
From top to bottom – Back, Home, View Apps, Drawing Tool, Source, Mute
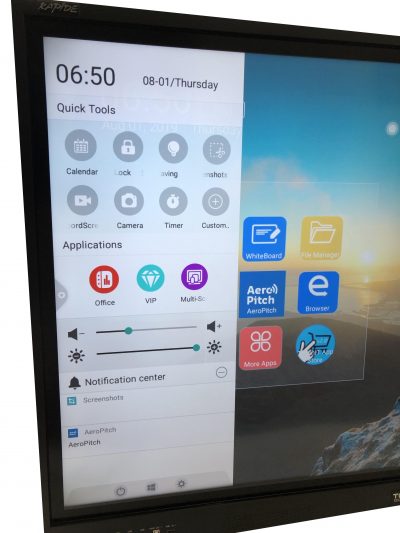
Swipe Menu
From each side of the LED, if you swipe in, you can view the following menu.
Here you can have access to some widgets like Calendar, Locking the screen, Standby, Screen Grab, Screen Record and Timer.
You can also access some applications as well as chains the Volume and Brightness of the LED.
Quite a bit to digest – next we’ll look at the Connecting the Rapide LED to the Internet.
Useful Links
YouTube Channel – https://www.youtube.com/TouchITtechnologies
TouchIT Rapide Playlist – TouchIT Rapide Interactive LED
TouchIT Blog – https://touchittechnologies.com/blog
TouchIT Rapide Blog Articles – https://touchittechnologies.com/category/touchit-rapide/