TouchIT LED and Chromebook
Where do we start with Chrome? Chromebooks and Chrome OS have taken the education market by storm over the last 18 months. They are particularly attractive due to their low cost and simple browser-based cloud applications which make managing Chromebooks easier than Windows or MAC for school IT departments.
Chromebooks are rapidly becoming the hardware of choice for schools. More Google Chromebooks are sold in the U.S. than Apple Macs, according to the latest figures from analyst firm IDC released in April this year. If all the students in a class are going to use the Chromebooks, you’ll want to be able to collaborate together and the LED will still remain the focal point of this.
There are a couple of things to remember when thinking about Chrome OS and Chromebooks in the classroom. First, while Google announced earlier this year that Chromebooks will have access to the Google Play Store and be able to run Android Apps, this is not the case for all Chromebooks and it is not available for older models.
There are only specific models -which tend to be near the higher end of the pricing scale – that can actually access the Play Store and the Android Apps. So, if you are planning to deploy Chromebooks in your school or district, and downloading Angry Birds for Android was high on your priority list, check the model with Google to see if they are compatible first.
Chrome itself is designed for Cloud Computing. It is not designed to have lots of applications installed on the Chromebooks for the students to use. Therefore, when you are considering Chromebooks, you really need to compare your software strategy needs against what will run on them. Chromebooks by nature do tend to be very underpowered with just enough juice to run a browser and navigate the web, so these are not a direct replacement for MAC and PC machines.
That said, you can get software applications that are designed to run in a browser, such as the Oktopus software that TouchIT Technologies supplies with its LEDs. Oktopus can facilitate connections, so that a student can see what is happening on the LED screen on their Chromebook too. Students can answer questions that are created on the LED with the education tools and then pushed out to the Chromebooks. Students can also interact directly with the LED in “collaboration mode” allowing them to annotate from their Chromebook on the LED and with other students in the class.
Chromebooks are no doubt a great tool and the access to information, resources, and the web that they provide to students at a low cost makes them very attractive to schools. Because the units are underpowered, double check with any hardware manufacturer that their hardware is supported on Chrome, as not everything is. It’s also worth checking that any software you plan to use is supported on the Chromebooks too.
Wall Mounting, Mobile Cart or Table Top?
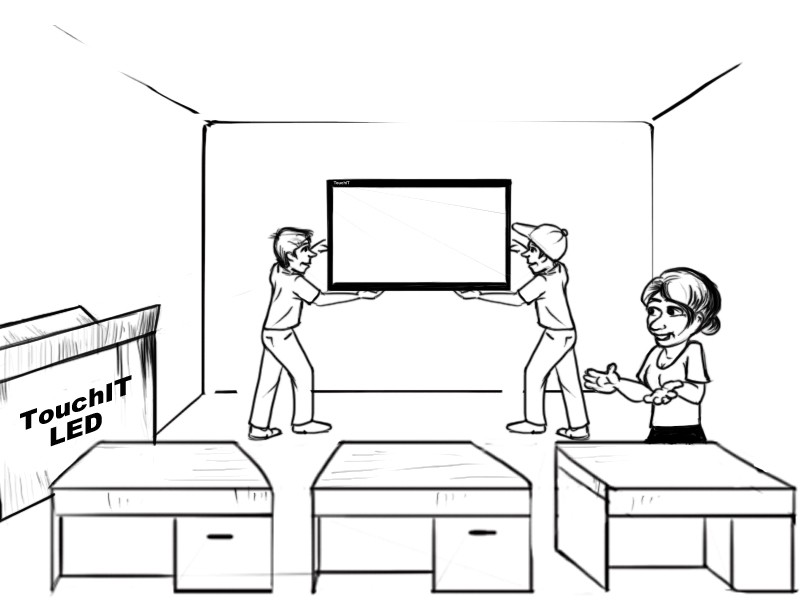
All Interactive Flat Panels regardless of manufacturer will have a number of different mounting methods. Whether all are available with all manufacturers you will have to check. What is important for you is how will the unit be mounted and who is going to do it.
Here are the different types of mounting:
- Wall Mount – by attaching a bracket to the wall and a hanger on the back of the flat panel, this method can be used to mount an Interactive Flat Panel to a wall.
- Mobile Cart – this is a portable option that allows you to attach an Interactive Flat Panel to a cart on wheels. It is free-standing and you can move it from classroom to classroom.
- Table Top – this is less common, especially for the larger sizes, but it is a free-standing bracket that allows you to place the Interactive Flat Panel in a usable positon on top of a table.
Let’s look at what you should be considering at time of purchase. While not wanting to write myself out of sales, a top tip here is that just because a manufacturer offers their own mobile cart or their own wall mount, it doesn’t mean that the Interactive Flat Panel will not work with others on the market. There are a number of brands, Ergotron, Chief, Unicol, Peerless AV just to name a few that have built very successful businesses on mounting and accessories for AV equipment. You many also find it a more cost effective solution to have your integrator quote another manufacture’s wall mount or a cart than going with the same brand as your Interactive Flat Panel.
That said, the main considerations should be is the cart or wall mount rated for the weight of the unit? Is the VESA pattern (this is the hole spacing for attaching a bracket) compatible with the mounting hardware you are considering?
My other top tip here really concerns table top stands. While it is possible to source inexpensive table top stands, most of these are designed for regular TVs. Regular TVs are much lighter and are not being touched all the time. What you find is that the cheap table top stands will wobble as they are not designed for the weight or movement. Therefore, I would recommend that you do go with the table top stand recommended by the Interactive Flat Panel manufacturer if this is your mounting method of choice.
Another consideration is – who is going to do the installation for you? One of the big advantages for the Interactive Flat Panels over their predecessors is that the mounting method is much simpler. At a bare minimum, it is what we call in the industry a “hang and bang.” This is where a bracket is “banged” – not literally here as it will be securely screwed into the wall – and then you “hang” the Interactive Flat Panel onto the bracket. This is quite a simple process and you may even be able to do this yourselves with your own facilities maintenance staff.
It becomes trickier if you need to have your power outlets moved or you want to run cables from one location to another. When you are getting installation quotes, if you are running cables or moving outlets a site survey by your installer is essential. Any quotes that you receive that are flat fee installations are usually for the “hang and bang” approach that I have highlighted above, so it is always worth checking.
Another consideration you may wish to look at is whether you want to have a “face plate” attached near to the Interactive Flat Panel. “Face plate” is short for Facilities Plate and what this consists of is a box with a number of inputs that allow you to plug your computer into the HDMI, the audio, the VGA etc. without needing to crawl underneath the LED and change the connection. The Face Plate is connected by the installer to the LED so that all the connections from the back or underneath the Interactive Flat Panel are accessible from a separate box. The Face Plate does finish off an install nicely but of course does add to the cost.
Position in the Classroom
As you are most likely replacing Interactive Whiteboards with the Interactive Flat Panels, the chances are that they will be going in the same position – front of the class. Your main considerations should be:
- Is the Interactive Flat Panel viewable from all desk positions in the class?
- Do you have access to an outlet?
- Is there space for the computer that is going to drive the Interactive Flat Panel?
Budgets aside here, as I recognize that for most schools this is not an option, but we have seen a lot of Interactive Flat Panels being installed into school “cluster learning environments”
What this entails is multiple Interactive Flat Panels (I know I know, think of the cost I hear you say) being installed into a single classroom. In that way, the students can all work in small groups at the Interactive Flat Panel instead of a whole class teaching approach. If you have the budget, it is a smart way to use the technology.
Cable Considerations
What is there to think about regarding cables? More than you would believe. Most Interactive Flat Panels come with an outlet cord, an HDMI and a USB cable. These can vary in length but I would say that most are around two to three feet. So, what happens if you want to extend the cables so you can have the computer at the back of the room and the LED at the front?
Wireless
There are some nice wireless kits on the market that will transmit your video as well as your touch to the Interactive Flat Panel without needing cable extensions. In my experience, though, these never work anything like when you are hard wired to the Interactive Flat Panel with a USB and HDMI cable.
HDMI vs VGA Cables
You may have noticed that I’m mentioning an HDMI and not a VGA cable. VGA is the blue cable that most of your old projectors would have used to connect to the computer. While it is possible to connect the computer via VGA to the Interactive Flat Panel, you will not get anything like the quality that you will get from HDMI. First, VGA is an analogue signal and second, it is constrained by the bandwidth or the amount of data it can send. This means that overall the image is nowhere near the quality of HDMI.
Can I convert VGA to HDMI? In theory it’s possible, but really not advised. Think of a big pipe and small pipe analogy. HDMI being the big pipe and the VGA being the small pipe. You can get an adaptor to connect the pipes together, but it is not going to change the amount of water that flows through the pipe. Waterfall is restricted by the small pipe. This is the same with a video signal. You can convert the connection but the signal will be only as good as the VGA cable allows.
HDMI Port or Graphics Card
If you don’t have HDMI ports on your existing computers, consider looking at external USB graphics cards. If you don’t have HDMI on your existing computers, then the chances are that they are quite a few years old. While they powered your interactive white boards ok, you are looking at higher resolution display from the Interactive Flat Panels. This will put extra pressure on the internal graphics card which will consume more of the internal memory and make the programs that you are using run slower than before.
For around $100, you can buy an external graphics card with HDMI. This will free up the processor from having to make your programs run better and give you the high-quality display you are looking for. It is also much cheaper than having to buy new computers for all your rooms.
Extending and Converting Cables
I mentioned that most Interactive Flat Panels come with a two or three foot set of cables. What happens if you need to extend? There are a couple of options. I’m going to start with the way that you don’t want to do it because it will cause you huge amounts of problems.
It is possible to buy very long USB Cables and HDMI cables online, cheaply. I’m talking 25 feet and above here. You categorically do not want to use these. The longer the cable is, the more the signal degrades or weakens. This can cause problems. Loss of touch in some instances and no touch at all in others. It is the cable length causing the problem, nothing else.
On the HDMI side, while the signal travels better than a USB signal, it is still not advisable to go over approximately 10 to 15 feet. What you should do with both HDMI and USB is use active repeater cables. These cables have a little hub at the end that boosts the signal down the next cable. This is a good way to extend your cables. They are a little more expensive than regular cables, but worth it to remove the headaches you will see without them.
The other way of extending the cables is converting them to CAT5e or CAT6. This basically converts the signals at each end of the cables and in between runs a network cable. This is also a very good and clean way of doing it but tends to be more expensive for the shorter distances. It is advisable if you are looking to do a distance of 50 feet or more that you convert to CAT5e or CAT6 rather than using multiple repeater cables.
Speakers and Sound
Almost all Interactive Flat Panels on the market have some form of integrated speakers. They are usually somewhere between 10 and 15 watts. This is more than sufficient. That said, most of the Interactive Whiteboards that were installed came with powered active speakers. So when you are comparing the sound that you had before and what you have now with the Interactive Flat Panel, you will notice a difference.
Normally, you would not need to have additional speakers connected to the Interactive Flat Panels. However, to emulate the rich bass sound that you enjoyed with your Interactive Whiteboards you would need to purchase additional speakers.
Room Control
Room control isn’t something that is particularly popular in Schools and School Districts because of the cost. However, it does have some power saving uses that could be included in a school environment.
Room control allows you to use a single control unit to control things like your curtains, lights, blinds and your Interactive Flat Panel. The control unit can either be a desk mounted unit or set up on a tablet device. It’s really pretty cool and there are some awesome integrators out there who specialize in this.
You may hear the brands Crestron and Extron banded around, these are the market leaders in this control space and Lutron for lighting. For the Interactive Flat Panel, what it allows you to do is control the volume, change the input sources, turn it on and off – anything that might be done from the front control buttons or the Interactive Flat Panel’s remote control.
RS232 is the communication port used for room control on most Interactive Flat Panels. The level of RS232 control available varies from brand to brand. While more at home in a swanky corporate boardroom, RS232 does allow you to send commands to all screens at once, to turn them on or off for example. You could manage this kind of command from your regular server through software and would ensure that at the end of the day, all of the screens received a signal to turn themselves off. This could save money on your electric bill. Something to consider perhaps.
This Blog post is an extract from the eBook “Bring Back My Whiteboard!” – Written by TouchIT Technologies CEO Andi Brabin. Enter your email address below to receive your free copy.