TouchIT Vitesse Manual

Connecting the On Board Android to the Internet
Once you have installed your TouchIT Vitesse either on the wall or the rolling cart and you have connected the power cord and switched the unit on, the next thing that you are going to want to do is connect to the internet.
You have two options to connect your On Board Android on the TouchIT LED to the internet. The fist is connecting via WIFI and the second is using an Ethernet Cable and the RJ45 connector on the rear of the unit.
Connecting Via Wifi
In order to connect your TouchIT Vitesse to the Internet via WIFI, you need to screw on the antennas that came with the TouchIT Vitesse LED to the side of the unit. There are 4 antennas that you need to connect. Three are for the WIFI and the further is for the Bluetooth. You can find these on the side input panel which is shown below.

Connecting Via Ethernet Cable
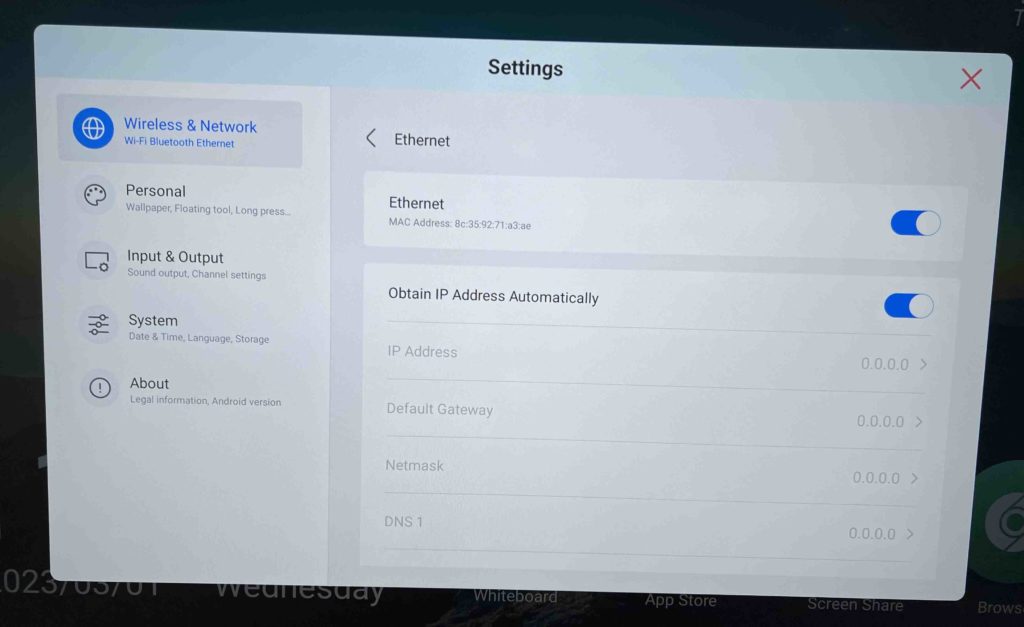
Plug one end of the Ethernet Cable into the RJ45 socket on the rear underside input panel at the rear of the LED and the other end into your Ethernet Port in your school or business. If your internet settings are automatic DHCP enabled, then your Vitesse will automatically find the IP Address and the DNS settings from your network and connect automatically.
If you need to enter your settings manually, then you need to enter the network settings menu on the On Board Android.
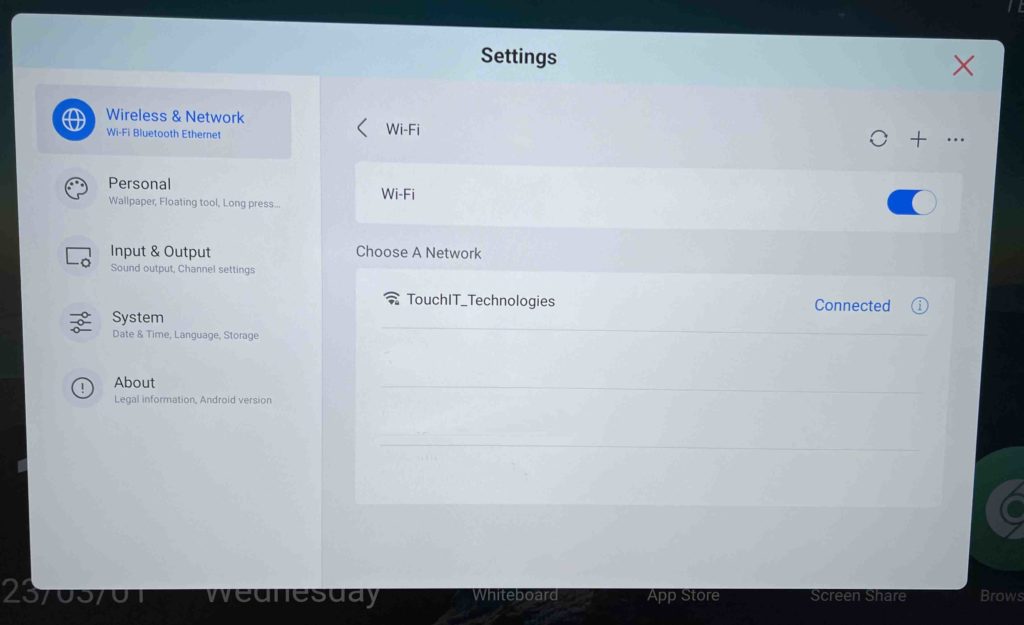
To Do this, from the home screen click on “Apps”, Then “Settings”, “Wireless and Network”, then WIFI
Make sure it is turned on, and that your network is displayed. Click on the network to enter your password. It will show as connected (like below) if you have successfully connected to your network.
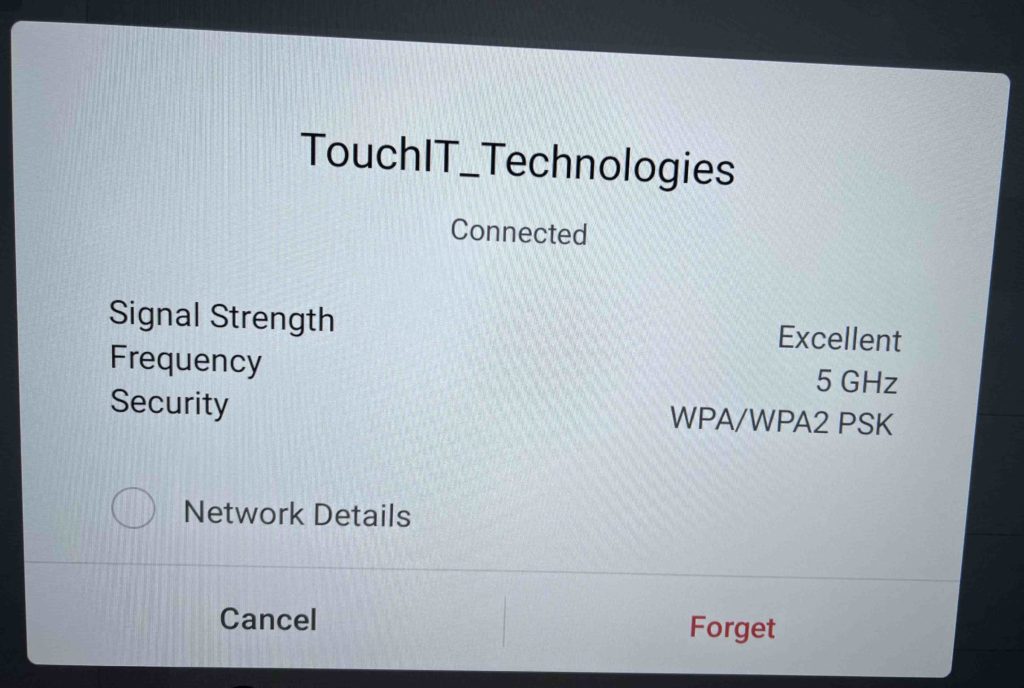
Click on the connected network to show the details.
With your Ethernet cable connected and turned on – you can connected via hard ware to your internet connection.