TouchIT Rapide Manual 2021

Connecting & Cabling the TouchIT Rapide
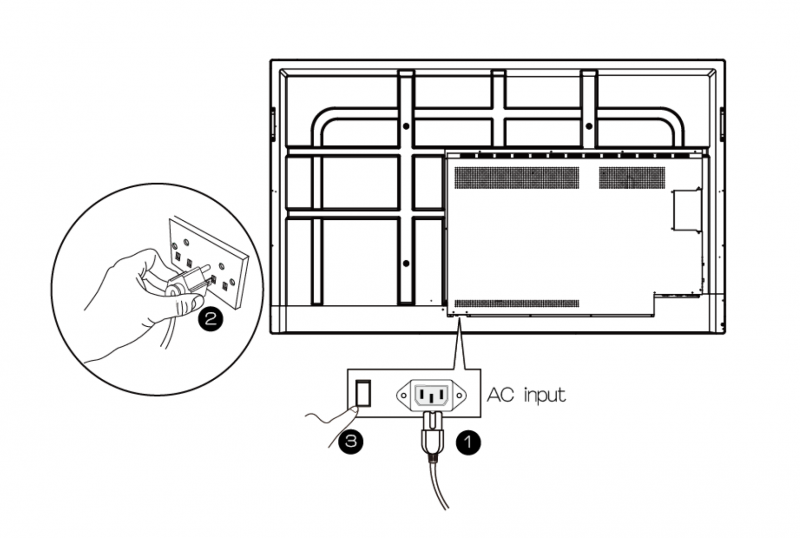
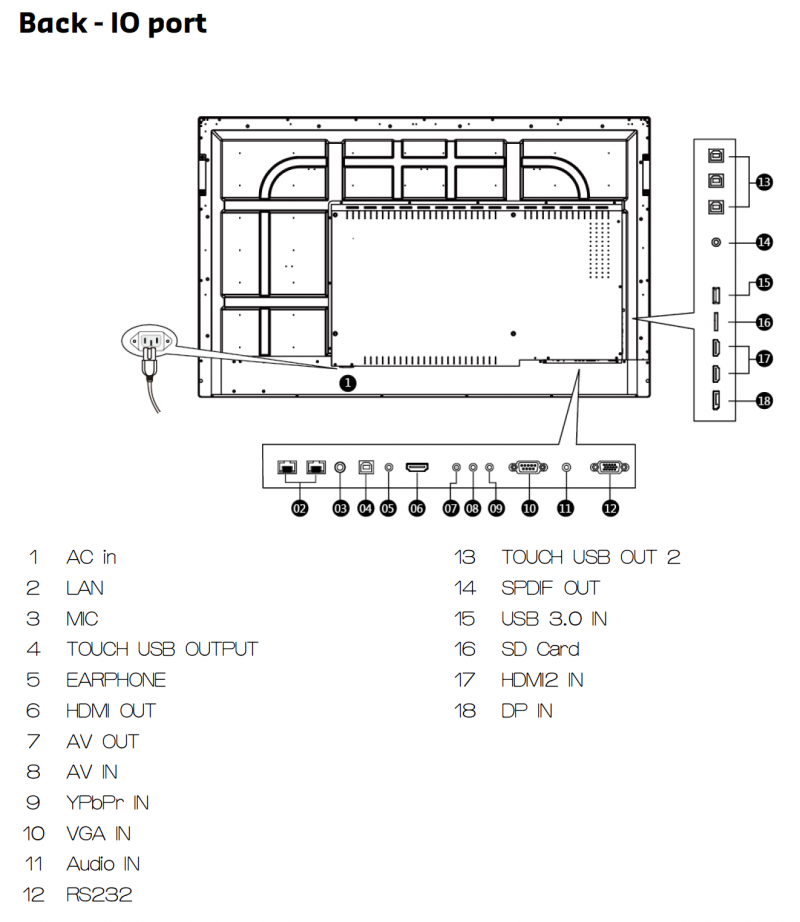
Power
First, you need to connect one end of the supplied AC Power Cord to an Outlet, and the other end to the right hand side of the LED (as you look at it). Switch on the power at the AC socket, then switch on the rocker switch on the right hand side of the LED next to your AC cable
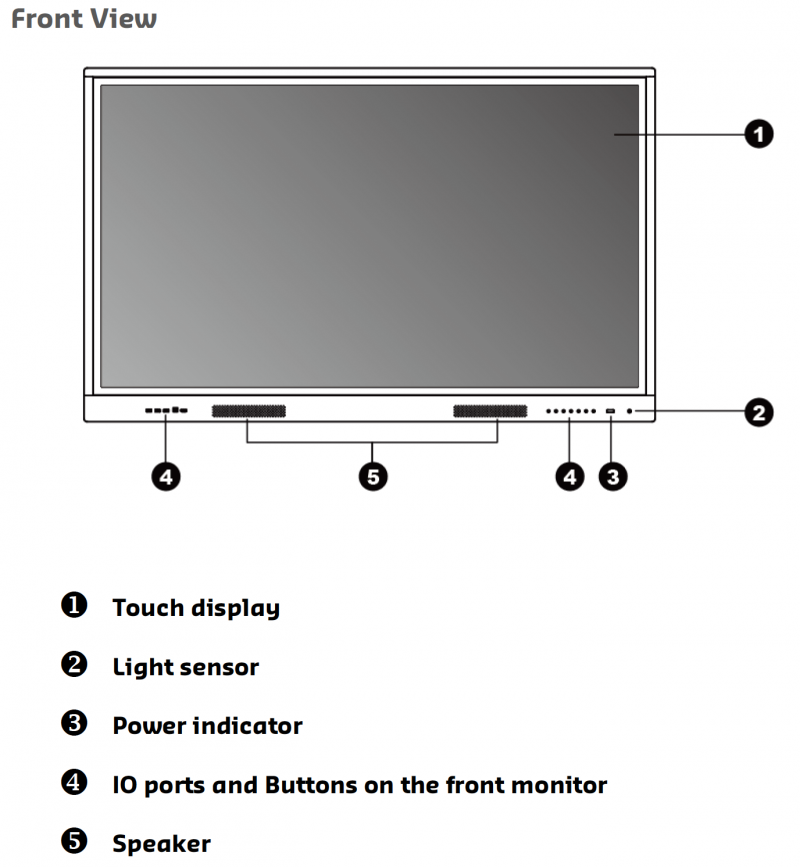
Get to know your TouchIT Rapide
USB Cable For Touch
Plug one end of the USB (B type) cable to the TouchIT Rapide LED and the other end USB (A type) connector to your computer.
We suggest using the rear USB For Touch port as your main connection leaving the front connection port for a secondary machine. Please note, you cannot mix and match Front and Rear ports. EG Both your HDMI and USB have to come from either the rear of the unit or the front of the unit.
If you can’t find the USB Touch input on the rear of the unit, it is on the underside of the input panel where you can see the HDMI inputs. There are more connections underneath the unit as indicated by the arrows on the image below.
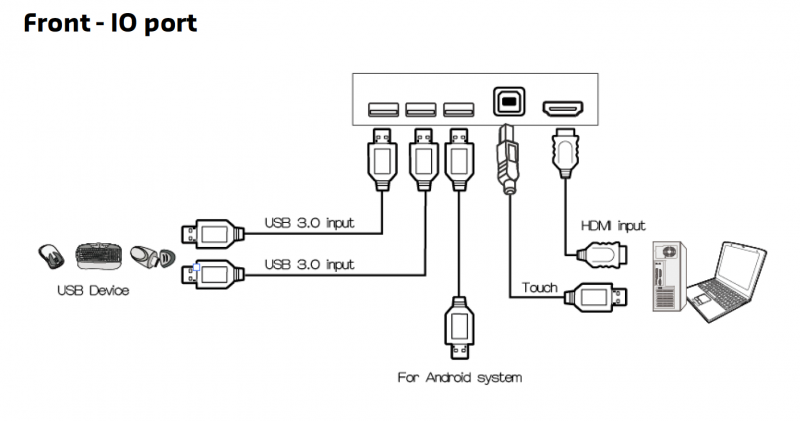
HDMI for Image and Sound
Plug one end of signal source connector of device ( PC, Laptop, IPC, or devices with HDMI), and the other end to signal source connector of the TouchIT Rapide LED. We suggest using one of the rear HDMI ports as your main connection leaving the front connection port for a secondary machine.
Insert the Batteries into the Remote Control as supplied.
