TouchIT FAQs
Please use the links below to filter the FAQs for the product or software that you are looking for.
Don’t worry, if you see a padlock on the front of the screen and it is asking for a passcode, the default code is 2580
This is a straight line, top to bottom down the middle of the keypad.
If you have changed the passcode there is not a master passcode and the firmware will need a reset. Please contact us for how to do that.
The TouchIT Rapide is durable and built for the classroom. It is designed to take the knocks and the bangs that you would expect in a classroom environment. Education is 95% of what we do as a company so we know how to design products for education.
Yes you can
With a swipe up, then a touch, yes, you can
Smart and Promethean have an Android 8 Interactive LED at time of writing – but they are different for sure.
Yes, you are able to do a lot more natively, what this means is without a PC connected. There is enough power now to run pretty much all the apps you can think of directly from the LED.
Thickness and weight are similar to be honest between the two. The Rapide is a little lighter, about the same thickness thought. For exact weights, please check out the spec sheet.
In short, its a black frame, more touch points, much more powerful onboard Android system that allows you to do more than ever without the need for a computer.
Up to 40pt touch – 10put on Android, 40pt on Windows and single point on MAC.
In addition to the built in drawing an note taking App, TouchIT App Store is pre-installed and you also have access to Contribute Cloud software that you can run natively on the LED.
Yes, it is in the box.
Sound is a personal preference. We say that the TouchIT Rapide has a room filling audio built into it.
Just use a damp cloth with water or window cleaner on – do not drip water into the electronics, just a damp cloth, not soaked!
No. For the first time, the TouchIT Rapide is a computer-replacing quality of touchscreen
We utilise Android 8.0 which is the fastest available on the market at time of writing
All models are the same specifications and come in 65″, 75″, 86″ and 100″
Configure Students For Casting
In order for your students to cast to your Interactive LED, you need to make sure that on their Chromebooks they have the add-on / extension installed.
Central Configuration and Installation
As an IT Admin, if you wish to do this centrally with group policy, please add the following extension to your Chromebooks.
https://chrome.google.com/webstore/detail/screen-capturing/ajhifddimkapgcifgcodmmfdlknahffk
Manual Installation
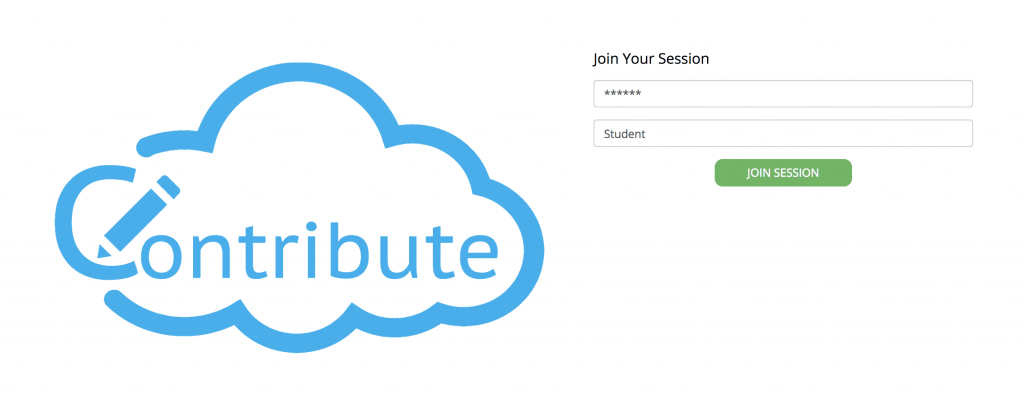
When you first join a session, you will be redirected to the Extension page. Enter your session ID and your name from join.contribute.cloud.
You will then see the extension page open in a new browser window.
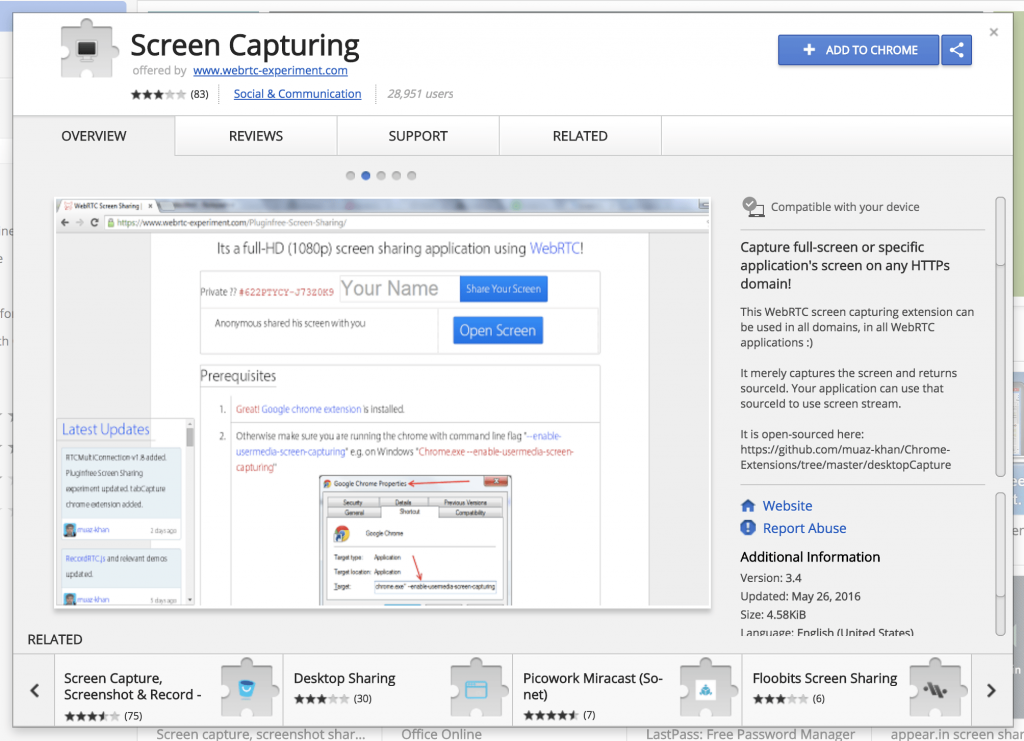
Click on the “Add to Chrome” button
When the extension is ready to be installed, you will see this message
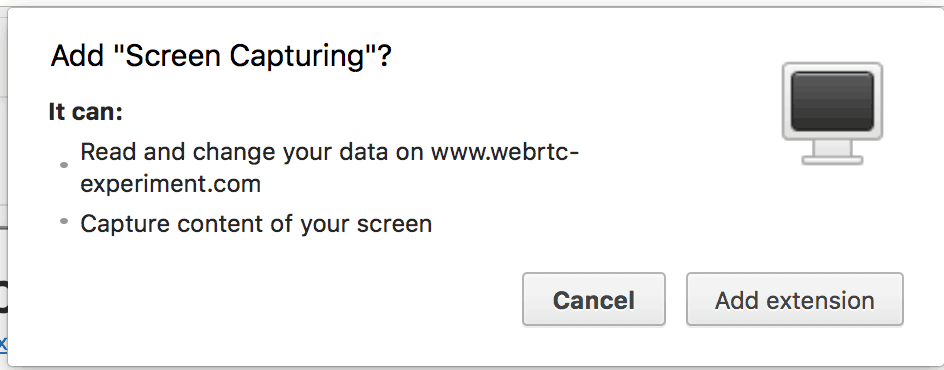
Click on “Add Extension”

You will then see the confirmation that the extension has been added.
No, navigate back to the contribute Cloud page that is already open in your browser, and click refresh.
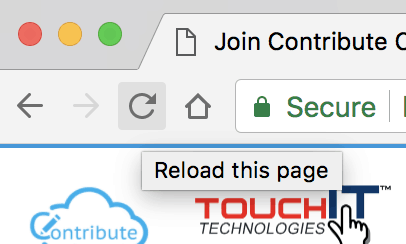
If your browser has installed the plugin correctly, you will now see the screen share page
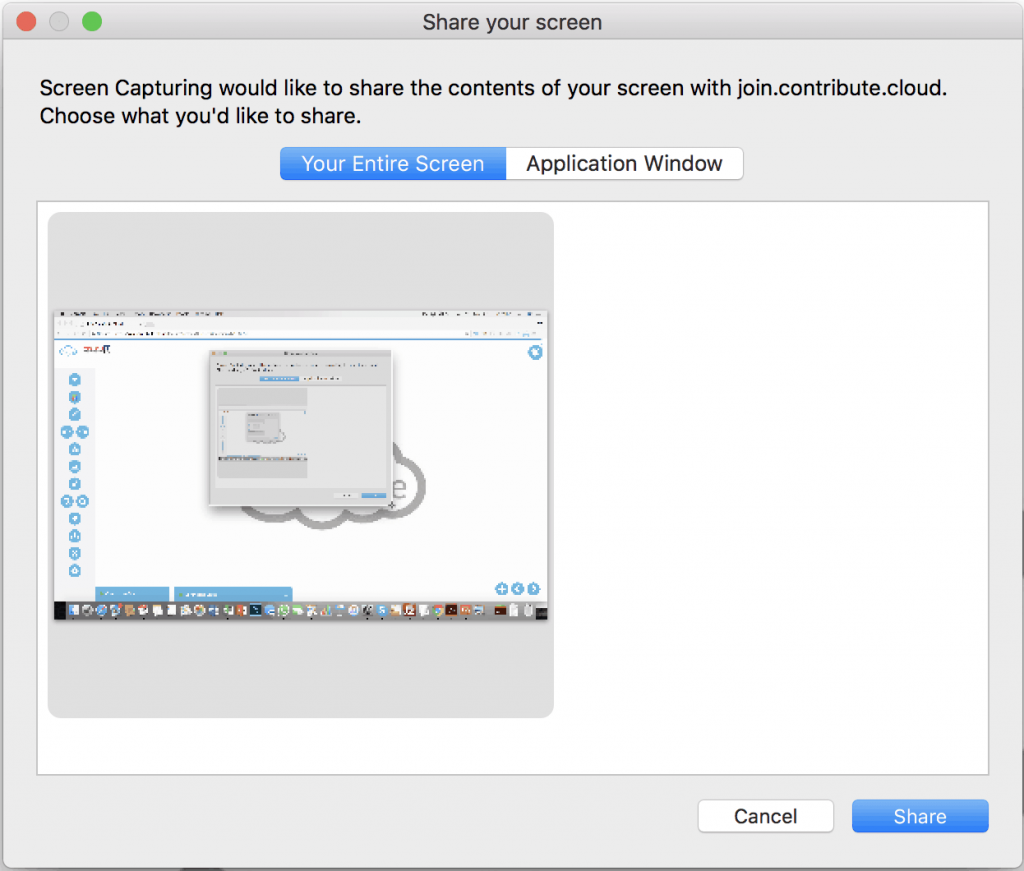
Click on “Share” and you are all set.
You host/teacher will now be able to select your screen for Casting to the LED.
Contribute Cast – Screen Casting for Students / Participants
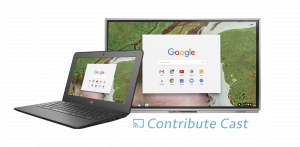
Contribute Cast allows teachers and presenters to control which student’s or participant’s screens can be “cast” up to the interactive LED. “Casting” is the ability to send the screen of a student or a participant to the LED without the need for wires. Traditionally, this is done with hardware like a ChromeCast Dongle from Google, but our system has been designed especially for groups of students or users so that a teacher or presenter can quickly and easily switch whose screen is casting.
When a teacher or presenter logs into Contribute Cloud, they will see the Contribute Cast window at the bottom of the screen.

If you click on the window, it will expand and it will show the students that are currently in your session.
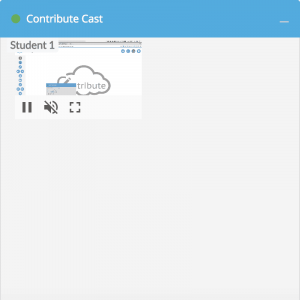
In order to have the students screen cast to the LED, you will need to click on this button.
If the students are remote, you can enable and disable their microphone by clicking on this button. Please note, if you click on this button and they are in the same room you may get positive feedback on your microphone. We recommend this be muted if the students are in the same room as the teacher or presenter.
When you have finished casting the student’s screen, you can click this button in the bottom right hand corner of the screen to close the cast window.
You are also able to pause the live casting of any of your students or participants by clicking on this image.
Adding a video to your presentation can be done in one of two ways. Firstly, you would select the video from your Cloud Storage, or indeed your local machine just as you do with image files or documents. You then can add it to the system. The second way of adding is for YouTube videos. Select the YouTube option from the left had side of the screen. Then, paste the full video URL into the window. You will then see a preview of the video. This can then be added to your presentation.
Once you have added an image, you need to select the cursor icon. You can then click on the image and you will see that it has dots around it that allow you to move and rotate the image.
Yes, Contribute Cloud does have an image library – of 1.5m images to be exact. In lesson/presentation mode, If you click on the image icon on the toolbar, you are then able to “live search” for any images that you require for your presentation. Select the image from the search preview and it will be added to your lesson as an object that you can move, or resize.
Unfortunately not. Our system is deigned so that you generate a new session ID or session code each time you start a session. This is for security reasons.
In the editor, if you click on the upper right corner of the slide preview (right hand side of the screen) you will be able to delete the slide before you save the presentation.
It will show yes, but after you have saved. When you save, we take a capture of it which is how we generate the preview.
Firstly, you need a browser. Secondly, you need to navigate to join.contribute.cloud (if you have not been sent an email invitation which you would click on to join) You then need to enter your session ID which your host will show or sent to you, enter your name and click join.
Firstly, you need a browser. Secondly, you need to navigate to join.contribute.cloud (if you have not been sent an email invitation which you would click on to join) You then need to enter your session ID which your host will show or sent to you, enter your name and click join.
You can, it is possible if you download and install the Chrome Browser from the TouchIT App Store. However, for best performance and results, we suggest that you run it through your computer.
It is a group chat system for everyone connected to the system.
Sure you can – our system is browser-based so it is operating system agnostic.
For exporting, yes, that is correct.
It is saved in “Contribute Cloud Format” which is a combination of database storage and links to your files. Your presentations are stored on our severs which are in the United States of America (New York to be exact)
Our system is browser-based so we are limited to the confines of a web-browser. Sometimes, we need to refresh the content on our webpages so that they function correctly.
Sure. We have a “reset your password” link on the front page where you sign into Contribute Cloud.
Yes, you can. When you play your lessons, at any time you are able to add a blank whiteboard, annotate and add images. You can then save your content too. If you then want to add more slides, you click on the “open folder” icon which takes you to your workbooks. Click on the preview of your lesson and it will open in the editor.
Contribute Cloud allows you to import content from your Cloud Drives and your local machine. Therefore, you can access both locally stored files as well as those in cloud storage. You are able to import images, video, PDF, MS Office, Google Suite documents.
You don’t “need” to use Contribute Cloud, the software gives you additional tools to make your classroom more interactive and collaborative. Not to mention, if you have 1:1 devices, you can Cast students machines up to the front of Class LED.
Contribute Cloud is a Cloud Computing Platform that allows teachers to create lessons in the Cloud from any Web Browser. There is nothing to install, you dont need a fancy computer, just access to the internet and a web browser. Connect to your Cloud Storage drives and drag your files directly into the Contribute workbook. Build up your lessons slide by slide from a variety of different file types. Once created, students can be invited to the class either through a manually created email, through Google Classroom integration or by entering a session ID in a web browser. Students then receive the lesson on their device, they can collaborate with the teacher and their peers on any device – even Chromebooks!
You don’t need to! One of the great things about the system being cloud based is that every time you login, you are using the most recent version of the system. We update the software on our servers so that you don’t have to do anything!
The number of students in a session is unlimited.
Absolutely!
Participants are able to cast their screens to the teacher/host on the LED. We can cast the whole screen even if you leave the browser window and open another application.
Yes you can.
You can either import your classes from Google Classroom if you are using this CMS. If not, you are able to create manually your class lists from your account settings in Contribute Cloud.
Class lists consist of a student name and email address. This is so you can send them invitations to join sessions.
There are two ways to collaborate, or be allowed to collaborate in Contribute Cloud. The first is that the host/teacher can give you collaboration privileges. They do this by clicking on the bell icon to open the notification window. They they click on the check box next to your name and you can now collaborate with them on a shared work area.
The second way is that you are the student or participant can request collaboration by clicking on the bell icon in the top right of the screen, then putting a check in the box to request collaboration with your teacher / host.
Absolutely. This is one of the main reasons we developed this systems was for it to be used on Chromebooks.
Yes it is. We integrate with Google Classroom so with a single click, you are able to import any classes that you have pre-populated in Google Classroom. This means that you don’t have to re-enter the information twice.
There are two ways to join a session. You can click on the “join” button that is in the email invitation that your teacher or host has sent to you. Or, you can visit http://join.contribute.cloud and enter your session ID number and name.
We recommend that you use either Chrome or Firefox.
Contribute Cloud, as the name suggests is Cloud-based. This means that you don’t have to install Andy software. We do ask that you install a browser plugin to enable the screen casting, but that is all.
Contribute Cloud is free for TouchIT hardware users. If you have a TouchIT LED or IWB, then you can use the system for free. If you do not have any TouchIT hardware, then please see our pricing page for more information.
You don’t need a static IP for the Y Series LED. Simple set the network settings to “use DHCP” or “auto-assign” and your network will assign an IP address to the LED.
You would need to download a VPN client to the on-board Android.
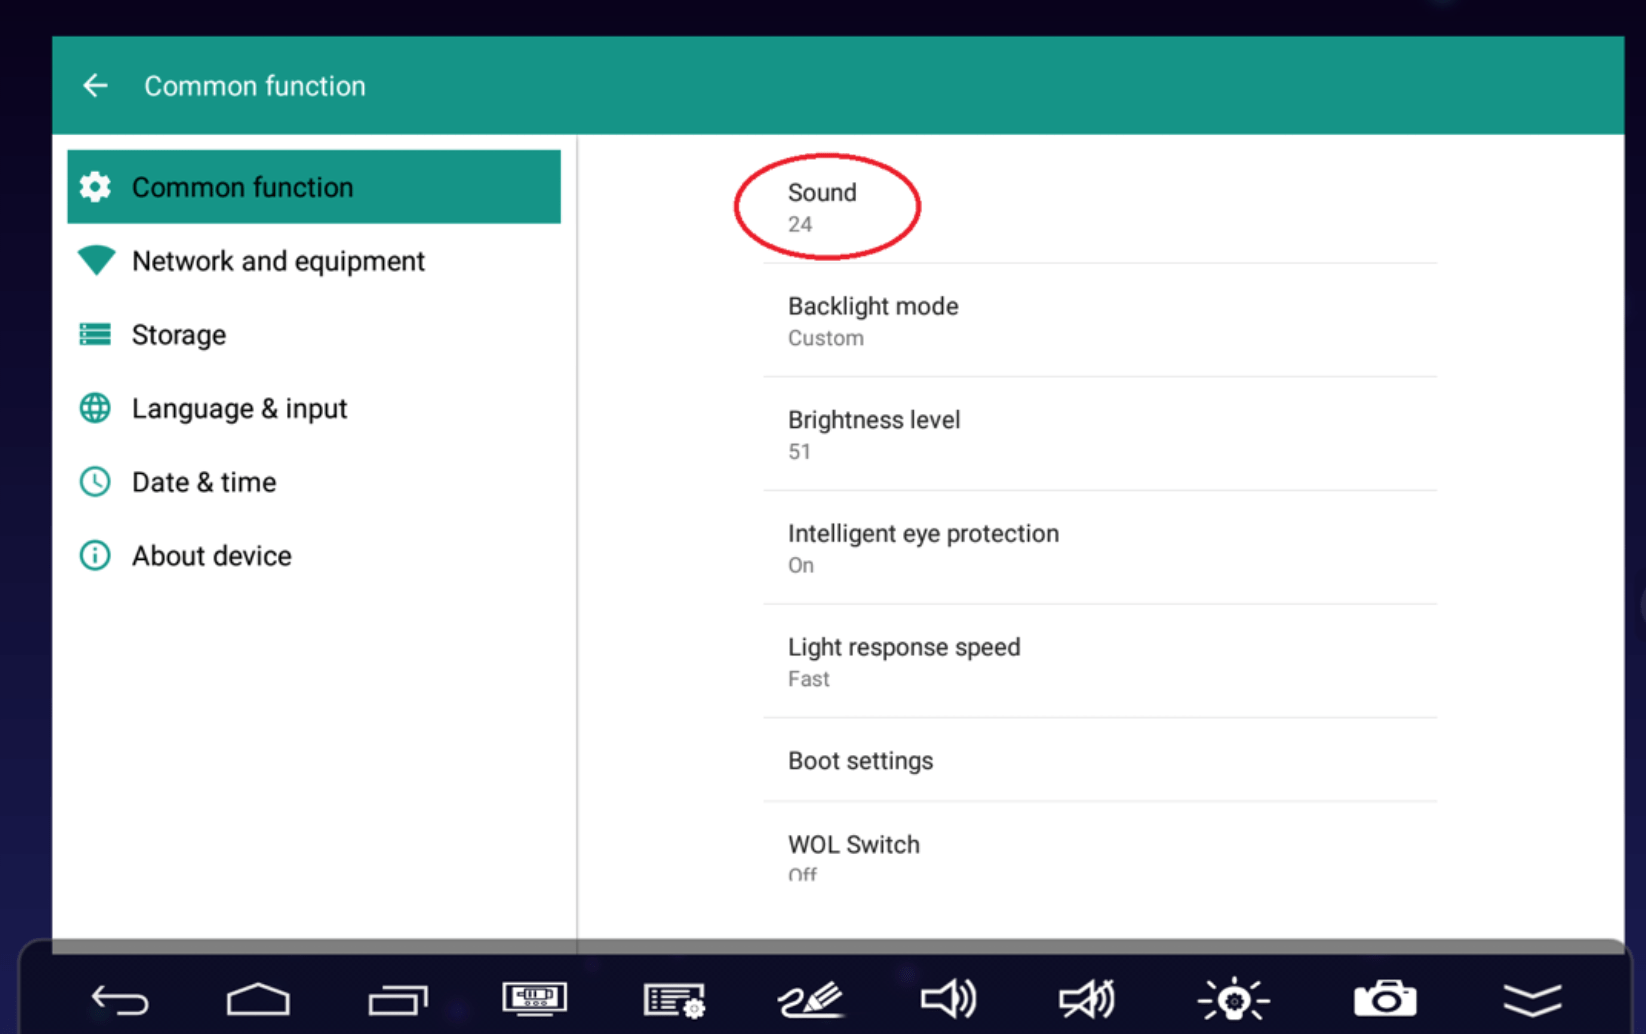
Yes it does – you simply would not create any touch sensitive zones. It is also possible to turn off the touch on the Y Series itself with the remote control
If you have a Y Series LED then you would have registered to receive your Key. If you visit www.touchittechnologies.com/lostkey/ and enter your serial number – we can email it to the registered email address.
That is correct. We do not include software or licenses in the box. You need to register to receive these.
Navigate to www.touchittechnologies.com/register and follow the instructions – watch the video first!
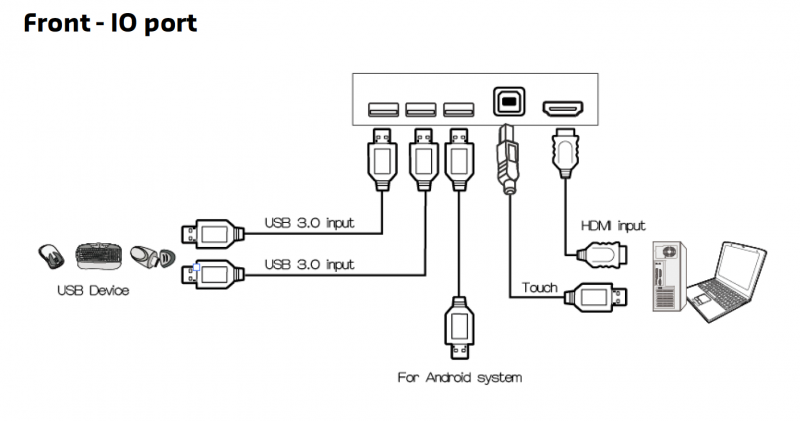
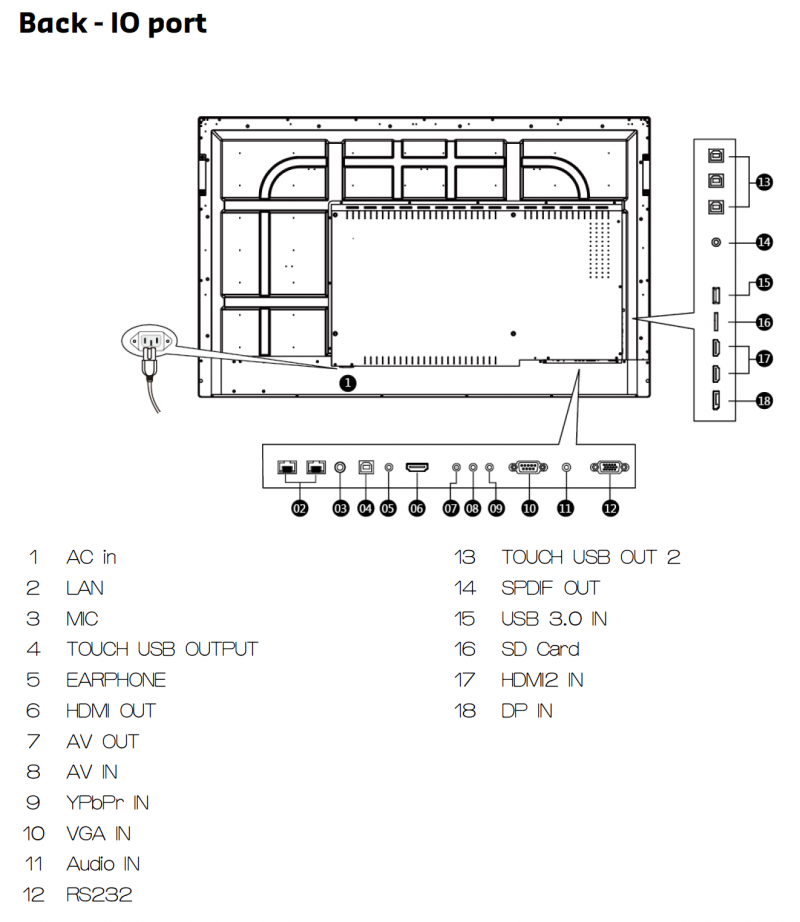
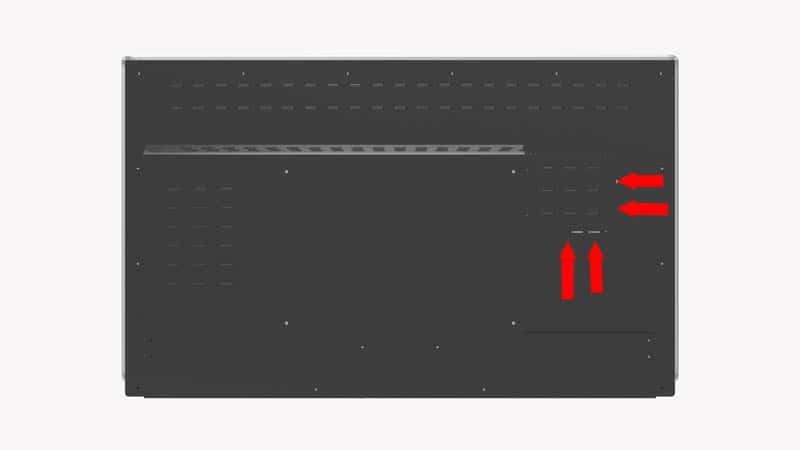
If the touch is working on your on board Android but not on your PC or MAC, you have probably mixed up the cables. What we mean by this is that you cannot have say a HDMI coming form the rear of the LED and then the USB for Touch connected to the front of the LED. You need to have both cables coming from the same location as the inputs are paired.
So, your USB and HDMI both have to come from either the front of the LED or the Rear. Please note on the Rear, there are additional inputs underneath the LED as shown in the Image below.
The Cables that come with the Y Series LED are 5ft or 1.5m in length. We recommend a powered repeater if you are going to extend these cables, especially the USB. HDMI can be extended without a powered booster to around 15ft but this differs from computer to computer. We recommend setting up and testing your unit with the cables supplied, before you introduce extension cables. Always use good quality branded cables, not cheap extension cables from eBay….
No, there are no drivers needed for Windows, MAC or Chrome operation with the Y Series LED.
No, there is no calibration to be done on the Y Series LED
Yes, the TouchIT Y Series has 2 x 10W integrated speakers. You find that the speakers are loud enough for most classroom applications.
Yes, the TouchIT Y Series is supplied with a remote control. You can also use the front control buttons and the touch screen OSD (On Screen Display) to change settings or input sources.
The Y Series has front USB connection to enable you to plug in a thumb drive or memory stick into the LED. Then, you can use the file manager in Android to open or copy your documents.
When there is an upgrade available, we will let you know. Due to the fact that the TouchIT Y Series runs on a custom Android ROM, only our ROMs are able to be used to update the LED.
The TouchIT Y Series is suppled via download of TouchIT Notes and also Oktopus Software
The size of LED that you choose for your classroom is usually dictated by budget. With Interactive Flat Panels, bigger is better so our advice is to install the largest LED that you can afford.
Due to the fact that the Y Series has on board Android, it is possible to use the LED without a computer attached. You can however connect your computer to the LED as well.
There is 8GB of storage space on the on board Android
The Y Series uses 5mm tempered glass
3 Years on site for USA and Canada
The unit itself will last for around 30 000 to 50 000 hours. That is approximately 5 years worth of continuous use. If you turn the LED off at night, you should be able to get around 10 to 11 years out of the LED.
The main differences between the S Series and the Y Series are;
- Frame color, S Series is Black, Y Series is Titanium
- Y Series has On Board Android
- Y Series comes in 4 sizes only, 55″ 65″ 75″ 85″
- Y Series is thinner
- Y Series does not have a built in PC option
- Y Series has no drivers for MAC and PC
Yes it does, the Y Series has a tempered anti-glare glass finish
Yes there is, please visit www.touchitappstore.com
Yes you can. The Y Series has access to the TouchIT App Store at www.touchitappstore.com where you have around 1000 Apps that you can install on the Y series, all for Free.
Yes it does, it comes with Android 5.1 installed.
The Y Series has 10pt Multi-Touch
The 55″ and 65″ are Full HD, 1920 x 1080
The 75″ and 85″ are 4K, 3840 x 2160
We offer 55″, 65″, 75″, 85″
This would depend on which model of Fusion you have. The LED Fusions from around Mid-2015 have the option of Freeze Frame on the remote control. Earlier models do not and this is not something that can be retro-fitted.
Yes you can. Whilst we dont have IR codes that we can send out, if your universal remote have a ‘learn’ feature, you should be able to configure it to work with our LEDs.
Do you manufacture a MAC Fusion? We do not, however it is possible to connect a MAC to the Fusion table instead of a PC. Contact us for more details on this.
Can I wall mount a Fusion? No, there is no need to wall mount a Fusion because it comes with its own mobile trolley/stand. If you are looking to wall mount an LED, you should choose the TouchIT LED Duo range.
No. We do not use any form of overlay. All our products are fully integrated products for the touch functionality. This leads to a better product and a much better user experience in our opinion.
Yes.The TouchIT Fusion comes in two seperate boxes and you will need to attach the monitor to the base. This will require some lifting and also the tightening of several screws for which you need a Phillips head driver ( not included )
No, we do all the installation for you at the factory, but you may need to activate some of the software online.
Snowflake is a suite of multi-touch applications that are included with the TouchIT Fusion
Yes, the TouchIT Fusion is a 3-in-1 product and can be used as a table , easel or regular LED
Yes, there is a PC included – see the website for exact PC specifications
Yes, the stand is electric height adjustable and electric tilting.
We offer the Fusion is two models, 4 point touch and 32 point touch.
We offer the Fusion is two models, 4 point touch and 32 point touch
42″ and 55″ sizes are available

