2.Lesson 2 - Creating Your First Workbook
Lesson 2 – Creating your First Workbook
The whole idea of Contribute Cloud is that you can take your existing materials from multiple file type sources and bring them into one place. For example instead of having to have several applications open to show PowerPoint, Excel, Images, PDFs etc, you can show all of these in Contribute Cloud. What is more, by opening these same documents in the software, you can actually make them collaborative which we will look at later. For this lesson, you are going to need to download our set of files for the Respiration Lesson we are going to create.
Files can be downloaded here. https://www.dropbox.com/sh/ypo5a90dg878j9u/AABV4jf4JEh6igWE31n0jcsUa?dl=1
Please note, they are from Dropbox so your firewall needs to allow you access to Dropbox.
When you have downloaded them, there should be 7 files in your folder, this will normally be found in your downloads. It may look slightly different on a Windows Machine or a Chromebook as the images shown is from a MAC. (Also ignore the green tick, this is from Dropbox)

What we are going to do now is use these files which you can see are images, PDF, DOCX, and video to create a workbook.
When you first login, you taken to the Dashboard. To create a new workbook, in the top righthand corner of the screen, next to the “logout” button is a “Create New Workbook” button.
Click on the create a new workbook button.

You then need to give your workbook a name, choose a subject and enter a description.
![]()
For this example, we are going to use “Respiration” and “Biology”
When you click “Create Workbook” you will be taken to the main workbook creation page. It is from this screen that you will add the content into your workbook to create slides.
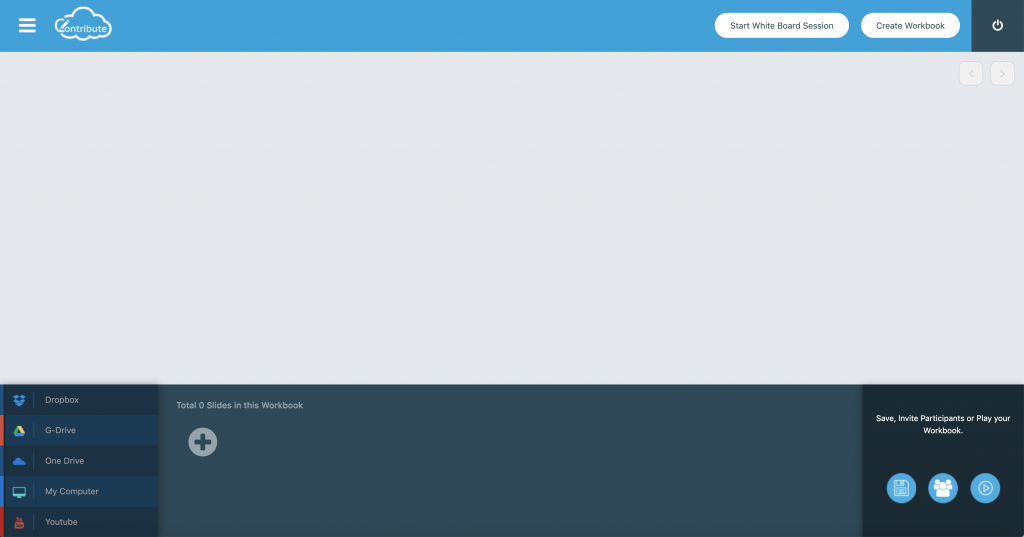
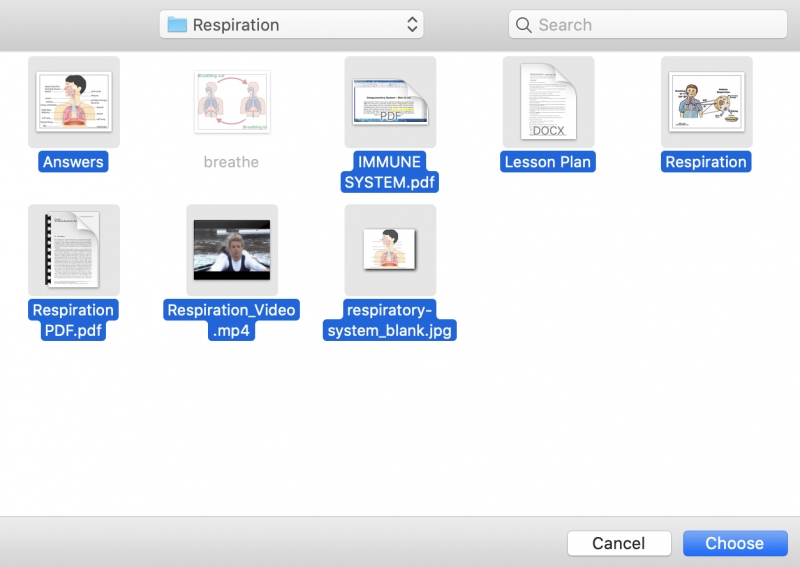
You will see on the left hand side of the page at the bottom of the screen, links to Cloud Storage Drives, Your Local Machine as well as YouTube. You don’t need to use all of them, just whichever one is your drive of choice. For this example, we are going to use “My Computer” – the principal is the same for all the other drives. Click on my computer and then navigate to the downloads folder where you have your 7 respiration lesson files. Select them all and then select choose. Again, your window might look slightly different if you are on a Windows machine or a Chromebook.
Once you have hit the Choose button, your files will be added to your Editor like the below.
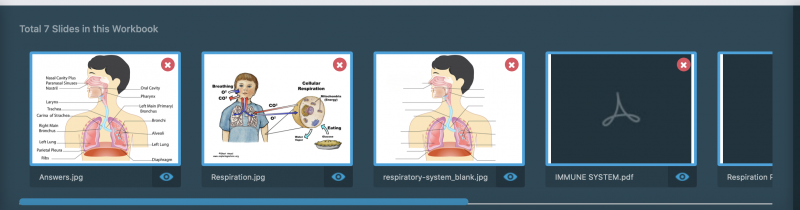
If you click on any of the slides, you will then see them in the large preview window. Please note that document formats with more than one page do not generate previews until you click the save button.
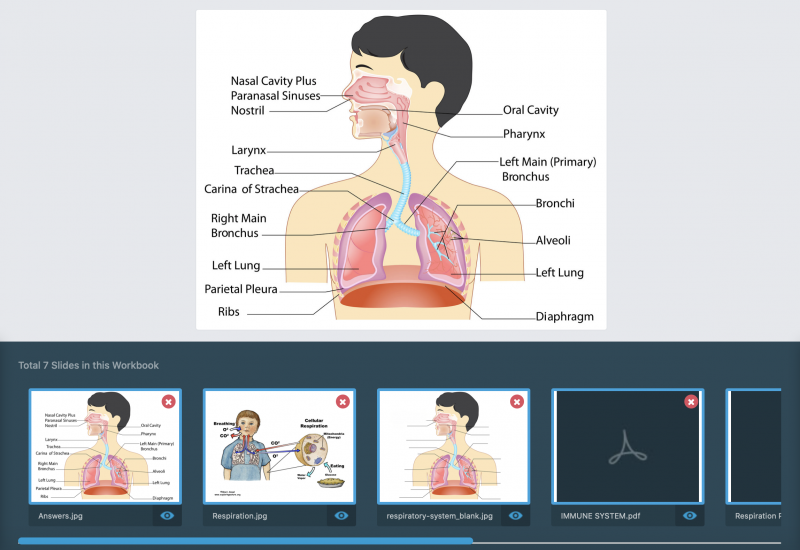
What we are going to do now is re-organise the slides into a better order by dragging them into the correct place. Let’s place the word document lesson plan as our first slide. When we have moved the slides into the order below, hit the save button and the previews will generate.
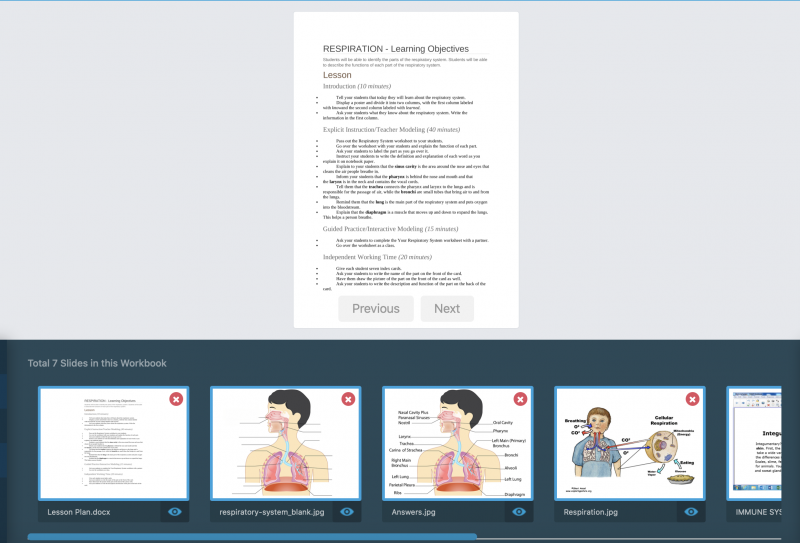
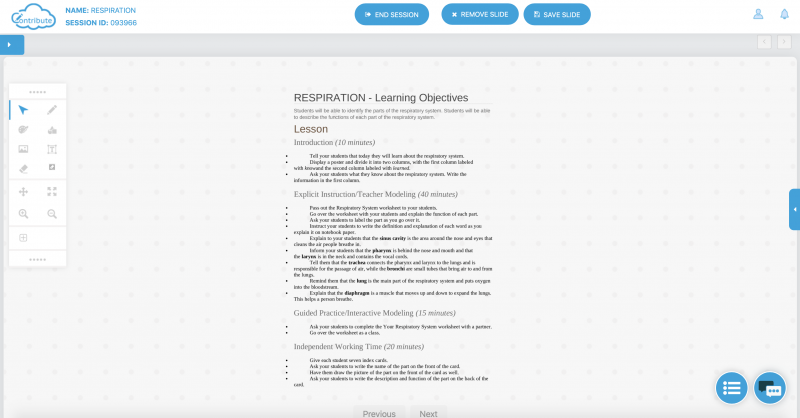
The Previous and Next buttons allow us to move through the multi-page document. If we click on any of the slide previews at the bottom we can see the slides in the large preview window.
We are now ready to send our lesson to the Playback Mode. To do this, click on the play icon at the bottom left of the screen.

You will see the screen below – please note your session ID will be different because it is unique and it changes every time you start a session even if it is the same content or lesson.