New Clear Screen Options

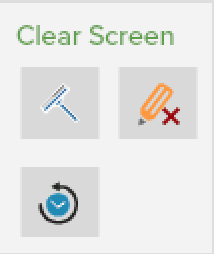
- Clear Screen
This will clear all objects that are currently on the slide.
- Clear Annotations
This will only clear annotations such as pen and highlighter objects. Everything else on the screen will be left intact.
- Reset Slide
For this to become activated, you must first open an existing lesson. Once clicked, the slide will be reset to how it originally appeared when it was first opened. If you have made changes to your slide and then saved the lesson, it will reset to the last save point.
New Text Options
- Improved text import from IWB files
- Text can now be rotated
- Scrollbars have been added
- New text control layout along the bottom of the screen
Text Box
Creating Textboxes
When the text tool icon is clicked in the sidebar or the Quick Tool Palette, the cursor will change to a crosshair. This indicates that a text box is ready to be created.
Click or tap once for a text box to be automatically created with a default width and height, or hold and drag to create a custom width and height. The words “Start Typing…” will be generated.
Start typing and the highlighted default content will disappear and will be replaced with your content.
The dashed lines indicate that the textbox is in edit mode.

Textboxes will also be generated for you automatically if you copy and paste text directly into OKTOPUS from another application.
Copy text from another document or website, and when inside OKTOPUS, you can then right-click to show the Quick Tool Palette and use the “Paste” icon or use keyboard shortcuts to paste.
Modifying Textbox Width and Height
Click or tap anywhere on the screen to bring the textbox out of edit mode.
When the textbox is not in edit mode, the width and height of the box can be adjusted by dragging the handles in the direction you wish. A scrollbar will appear if the text does not fit. This may be useful if you need to place a lot of text in a small area. The scrollbar becomes active after clicking away from the textbox and the drag handles are no longer showing.

Editing Textbox Content
To enter text editing mode double click / tap the textbox.
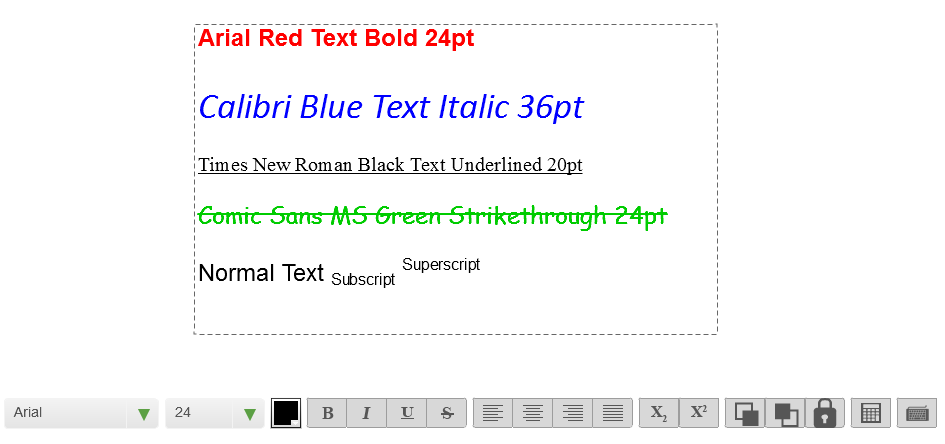
Text font, color, and size can be customized. The text box controls will appear at the bottom of the screen, supporting different fonts and font sizes, bold, italics, underlining, strikethrough, superscript, subscript, text align, and locking.
Highlight the text you want to format, and then choose the formatting you want to apply from the text controls.

To exit text edit mode, click or tap away from the text box.
To move the location of the text box, click or tap and drag to the new location. To enter editing mode again, double click / tap.
Text Table
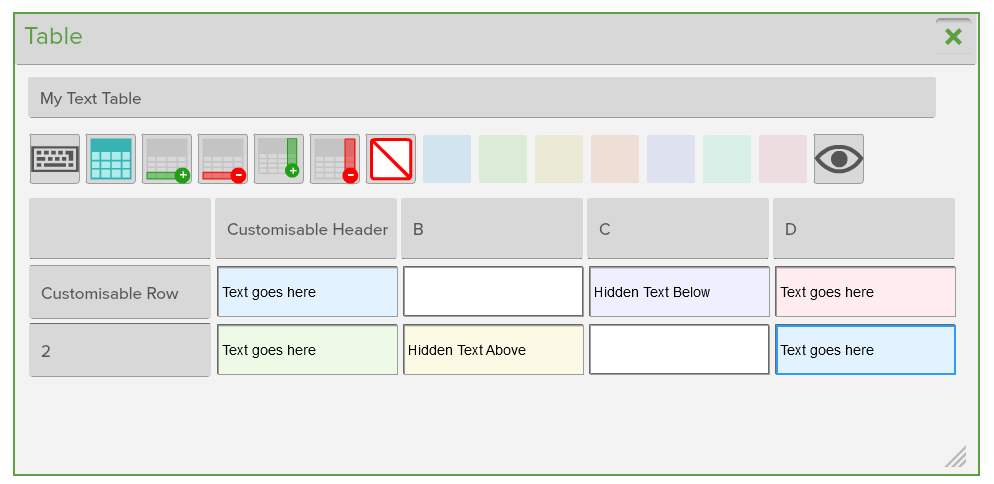
The textbox controls also includes a “Text Table” tool. This is similar to the maths table tool, but the text table tool allows you to hide/reveal text and does not generate graphs.
Easily add and remove rows, type in header / row labels, specify cell color, and hide or reveal cell contents.

