RS232 control allows you to connect 3rd party control systems to our Interactive LEDs and non-touch commercial LEDs. The features of the RS232 control are very similar to a remote control. The difference being that usually they are incorporated into a room control system that can control other equipment in the room from the same control “box”. Examples of companies who produce such control equipment are Crestron and Extron.
Built into our Interactive LEDs and non-touch Commercial LEDs is RS232 control. For our pre 2015 models, we implemented an RS485 port which can be converted to RS232 through and adaptor. From 2015 onwards, we have implemented a direct RS232 connection to our LEDs. The control codes that you need depend on the exact model that you have. A rule of thumb is below
2 point touch – RS485 – Here are the control codes
4,6,10 point touch – RS232 – Here are the control codes
4K Resolution Screen – RS232 – Here are the control codes
If you are unsure, please contact us with your serial number and we will advise the correct codes.
Cable Specification – please read the Cable Specification Documents above to make sure your interface cable is made up correctly
The principal behind the control regardless of the unit is the same; all our screens expect the codes to be sent to them in HEX form from the “control box” The Crestron and Extron programmers amongst you will know how to add the appropriate formatting to the hex codes to make the into the appropriate format.
In the simplest of RS232 control setups, you can connect a serial port to your PC (usually via USB), then a serial cable from the port to the RS232 port on the LED. Your port should then show up in Device Manager in Windows as a COM port with a number.
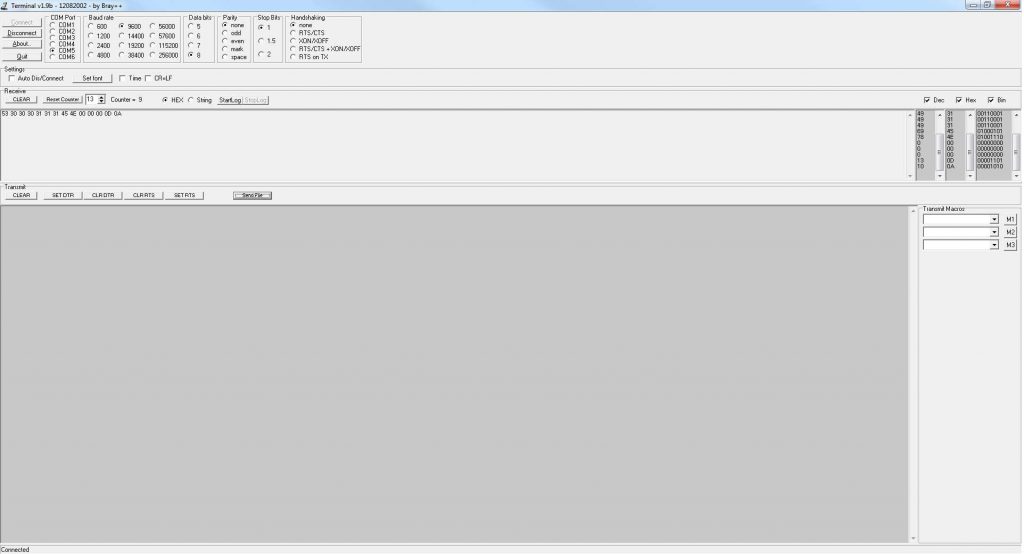
For the example below, the RS232 connection from the LED is direct to a PC on a USB serial port which installed on COM5. You can then use a hex editor (Hex Editor Neo is a free download) to create the HEX code from the Command list (from the file links above) and save it into a TXT file. You are then able to send the HEX code TXT file through Terminal (free download here) to the TouchIT LED to control the unit’s features.
Hex Editor

Terminal
Aside from the Ping command, it is not possible to query the LED and get a response. Our responses will allow a control unit to query the state of the unit (e.g. whether it is on or off) otherwise our control codes are single direction codes.
Notes for Integration into Crestron – Courtesy of Alan Patin of SAIA. Thanks for the feedback Alan!
Here is some feedback of what Alan and the team over at SAIA found when integrating Crestron with the TouchIT 4K LEDs.
-
We made up a cable matching the specification supplied in the RS232 4K document above. The cable we made up is a standard 3 conductor rs-232 cable with pin 5 as the shield / ground and pins 2 & 3 crossed between the 2 ends.What to do if you see the MSTAR Menu
The Mstar menu appears when you are interfacing with the LED if you are including a return character in your string. If you hit “Enter” on a keyboard or include /x0D in the string, it will go into the menu mode. Once in the menu mode you must exit it by hitting “esc” or sending an “escape” sequence. Otherwise, it will not respond to legitimate “TouchIT” commands.
This is probably worth noting if other Crestron integrators have problems since it is standard practice to include a return sequence at the end of any serial string sent via Crestron. To give you an idea of how “ingrained” ending a string with /x0D is for Crestron programmers is – I had to convince Cody one of our programmers that he could send a string without it!!! He didn’t believe that the control system would actually send the string without that return character!!!
Crestron Programmers please note! Thanks Alan!
For more information, please contact our technical support.